How To Dispose Of And Recycle Leftover Paint Safely
August 12, 2025

Nobody ever buys just the right amount of paint to use, unless they're really really lucky.


In most cases, you'll end up with some leftover (or a little short if you're unlucky).


What most homeowners do when they have leftover paint is usually to just store it away, and that's a smart move, because you may need it later on for touch-ups, repairs, or color matching.


The problem is, a lot of times, after a year or two, when they eventually have need of the paint again, it's separated, crusted, or unusable.


This is often because they didn't store it properly, but it could also be because it's past the shelf life of the paint.


Whatever the case, knowing how to dispose of paint you no longer need or can use is important, because improper disposal can not only be very harmful to the environment, but is also illegal in some regions.


If you're wondering why something as seemingly harmless as disposing of paint can be illegal, that's because it's not harmless,
far from it.


We'll go deeper into their dangers later on, but for now, you just need to know that they can be extremely dangerous if you just casually throw them into bins.


And if you still choose to go ahead with improper disposal, you risk facing fines of hundreds to thousands of dollars, being liable for cleanup costs, and even being criminally charged.


So don't just chuck your unused paint into the bin. Here's what to do instead.


Why Proper Paint Disposal Is So Important


Starting with the environmental effects, when you pour paint down drains, it can clog up pipes and disrupt wastewater systems. They won't be filtered out by wastewater systems either, since these systems aren't designed for paint, so your paint will get past these systems and go into waterways.


Through these waterways, they then flow to rivers, lakes, and oceans, harming aquatic life and contaminating drinking water.


That’s not all though. As if environmental damage wasn’t bad enough, improper paint disposal can also severely wound workers who’re working around it.


In the best case, workers may only inhale the VOCs and experience symptoms like headaches, dizziness, and nausea.


But in the worst cases, since paints and thinners are flammable, when mixed with hazardous waste like batteries, they can easily ignite or even explode, especially under heat and pressure in compactors, landfills, and trucks.


This is exactly why it’s illegal to dispose of leftover paint without taking the proper steps first. You could end up costing people their lives or causing huge fires to break out.


It’s also why the punishment for unsafe paint disposal can be quite severe, ranging from fines of hundreds of thousands of dollars, to even imprisonment.


These punishments may seem severe just for throwing a can of paint away, but they’re necessary to deter the unthinkable harm that could happen from that mere can of paint.


How To Not Waste Paint

Homeowner speaking to paint store staff about choosing and buying house paint

First off, before we get into disposal and recycling, let’s go over ways to not waste paint, so that you could potentially not have to dispose of anything and not waste any money at all.


Minimizing waste starts from the beginning. When purchasing paint, many homeowners will overbuy by a gallon or more to be safe, and that’s not wrong.


The last thing you want is to run out of paint halfway, so it’s totally fair to buffer some extra.


However, keep it to a gallon. A gallon of paint is more than enough buffer, even if you’re painting a large room. Anything more than that will very likely never be used, and will only end up as paint wastage.


After the painting is finished, as we mentioned at the start, the majority of the time, you’re going to have at least a little paint left.


At this point, it’s a good idea to set aside a little leftover paint for future touch-ups and repairs, but there’s no point in putting aside too much, because realistically, you’re probably not going to need to do many touch-ups and repairs. Just 8-16 oz should more than suffice.


If you only had a little left, then you can set all that aside for future needs. But for most people, even after putting this little bit aside, they’ll usually still have some more paint left.


So what happens to the rest?


Here are your two main options.


Option 1: Use It For Other Projects


Assuming the color fits, here are some other projects you can consider using your leftover paint for:

  • Accent Walls or Feature Panels: Use your leftover paint to add a pop of color to a small wall, niche, or alcove
  • Doors, Trim, Baseboards, & Window Frames: If you have enough leftover, you can use it to repaint your doors, trim, window frames, or baseboards to give them a brand new look.
  • Furniture Makeovers: You can also give your furniture new life by repainting them. This could be your old dressers, bookshelves, side tables, etc.
  • Existing Touch-Ups & Repairs: Look around your home and check if any areas need touching up or repairing.


We’ve listed some more common use cases, but this list could go on and on. You can use your leftover paint anywhere, as long as the color fits and the surface is suitable for latex paint or whatever paint type you’re using.


You could even use it for canvas painting or your child’s school project.


Option 2: Donate It


If you’re not using your paint and don’t want to just dispose of it or recycle it, why not donate it somewhere where it could be put to better use?


We’re not asking you to go knocking on your neighbors’ doors and start asking every one of them whether they want it. Chances are, your neighbor probably won’t need that exact shade of paint you have at that exact point in time.


But if you’re offering it for free, most people would be more than happy to take it — and then leave it untouched for the next few years.


Instead of that, here are some places where your paint would likely be needed and well-appreciated:

  • Community centers
  • Schools (for their art programs)
  • Theater groups
  • Youth clubs
  • Habitat for Humanity ReStores and similar non-profits


Just make sure that you’re donating usable paint in good condition.


How To Recycle Paint

Paint recycling site worker holding a can of orange paint from the recycling site

There are many reasons why people recycle paint instead of donating. This could be because:

  • You couldn’t find anywhere suitable to donate
  • You don’t have enough left to donate (certain donation outlets have minimum paint amounts for donation)
  • Your paint isn’t in the best condition
  • Your paint isn’t latex paint (most schools and donation programs won’t accept oil-based or solvent-based paints due to health concerns)
  • You just don’t want to go through the trouble of going to various donation outlets


Whatever the reason, if you’re looking to recycle paint, here’s what you need to know.


Recycling paint is the same as recycling anything else. You make sure it’s in a state to be recycled, meaning it’s still liquid (doesn’t need to be in tip-top condition, but has to at least be liquid) and in the original container, and you drop it off at the recycling site.


The thing is, you can’t just drop off your paint at a normal recycling bin. Paint recycling is a very different process from normal recycling materials, so it needs to be a dedicated paint recycling outlet.


To recycle paint, it needs to go through the following process:

  1. Collection & Inspection: Paint is collected at drop-off sites, then inspected to check if they’re still usable and not contaminated.
  2. Sorting: Next, they’re sorted by their type (water or oil-based) and color.
  3. Processing: Then, they go through a round of processing, where they’re blended together, filtered to remove contaminants, and finally tested for quality and performance.
  4. Re-Tinting (Optional): Before they’re ready for use again, they may or may not be re-tinted to standardize the color.
  5. Packaging & Redistribution: The final step is to package the now ready-for-use recycled paint into new containers, where they’ll be labeled “Recycled Paint”. They’re then either sold at discounted prices or may be donated to community groups, non-profits, and public agencies.


As you can see, the paint recycling process is a highly specialized one, and normal recycling centers just lack the equipment and expertise to properly recycle paint.


Now, depending on the state you’re in, it may or may not be easy to find a recycling program.


Currently, the largest paint recycling program in the US is PaintCare, which is a stewardship program.


PaintCare


A product stewardship program is a system in which manufacturers take responsibility for ensuring the proper end-of-life management of their product, which in this case is paint.


So wherever PaintCare operates,
all paint manufacturers in that area must help fund it by paying a small fee for every container of paint sold


That fee is built into the price of the paint, and you’l sometimes see it on your receipt labeled as the PaintCare fee. This amount typically ranges from $0.65 to $0.95 for 1-2 gallons, but goes up to $1.35 if you’re residing in Vermont.


Here are the areas that PaintCare operates in:

  1. California
  2. Colorado
  3. Connecticut
  4. District of Columbia
  5. Maine
  6. Minnesota
  7. New York
  8. Oregon
  9. Rhode Island
  10. Vermont
  11. Washington


PaintCare is also going to be launched in Maryland and Illinois, but they’re not active as of this moment.


If you reside in the listed areas, you’re in luck. All you need to do is bring your recyclable leftover paint to any PaintCare drop-off location. Drop-off is free of charge since it was already factored into your purchase price.


To find a drop-off site, use PaintCare’s
drop-off site locator tool. This will usually be a participating paint or hardware store.


Do note that some locations may have quantity limits, so if you’re bringing more than a few gallons, you should call in to check if they’ll accept that.


If your region doesn’t have PaintCare though, here are some other options.


Household Hazardous Waste (HHW) Programs
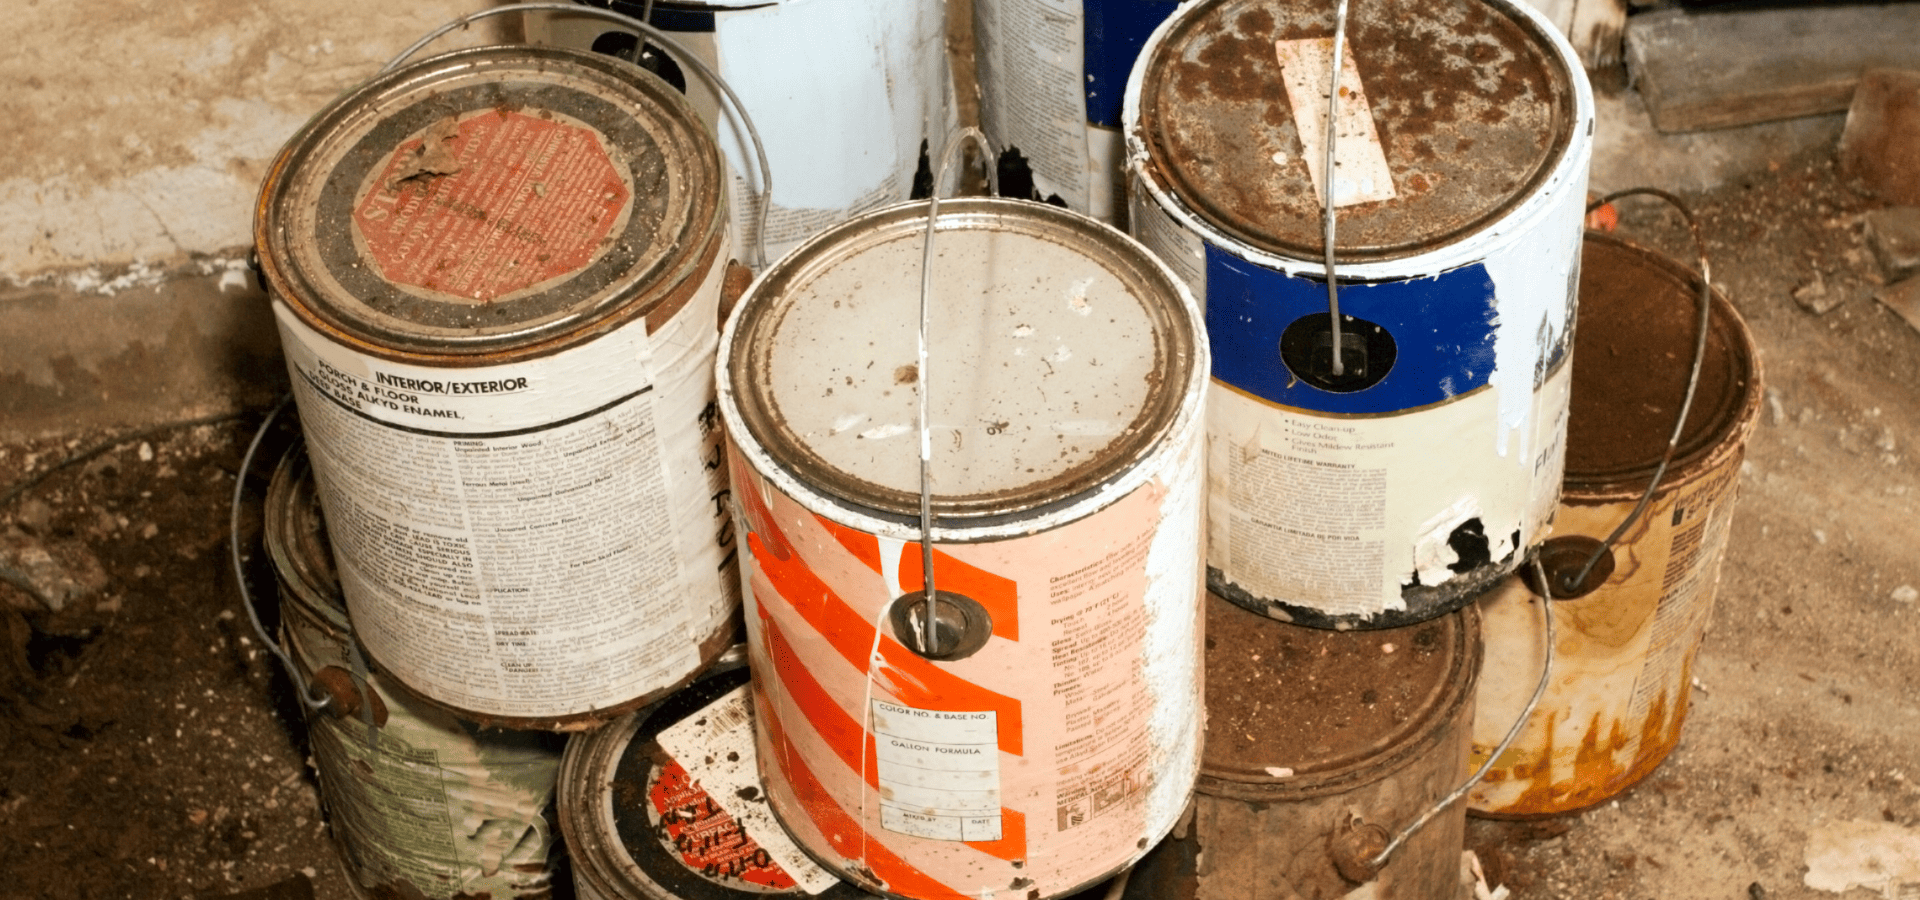
Cans of leftover oil-based alkyd paint to be dropped off at Wake County's HHW collection center

Almost every state has a HHW program, BUT not all paints are hazardous.


The main purpose of HHW programs is to ensure safe hazardous waste handling, which does include oil-based paint and spray paint, but not latex paint.


That said, some HHW programs do accept latex paint.


If your latex paint is recyclable, they’ll then either send it to paint reprocessors to turn it into new recycled-content paint, or give it to reuse programs, non-profits, and public agencies.


And if your paint isn’t recyclable, they’ll help you safely dispose of it.


Non-Profits & Community Reuse Centers


You can also donate them to non-profits and community reuse centers.


This ties in with our point earlier on donating to not reduce wastage, but the difference here is that if your paint is recyclable, but not in good enough condition to be usable, these outlets can help you send it to paint reprocessors.


It’s not a guarantee though. These outlets often reject unusable paint, but there are some that do help you recycle them, so always call in advance to check.


Hardware Stores


Like with non-profits and community reuse centers, certain individual hardware stores may help you recycle paint as a local service, but it’s not guaranteed, and you might need to pay a small fee.


How To Dispose Of Paint


If you’ve already gone through the options above and still have leftover paint, or maybe your paint is already unusable and needs to be disposed of, here’s how.


Disposing Of Latex Paint


Latex paint is generally much less dangerous and toxic than oil-based paint, but it can still clog pipes and affect wastewater systems.


As such, you need to dry it up before throwing it away.


For smaller amounts, all you have to do is leave it in a warm, ventilated area and ensure the lid is off so that it’s exposed to the open air. Small amounts will dry in a few days or weeks, depending on the thickness.


For larger amounts, you’ll need to mix in kitty litter, sawdust, shredded newspaper, or sand, and then stir until the material is evenly blended. These will absorb moisture and help your paint dry more quickly.


Then, just let your paint sit until it’s fully hardened.


If you want an even faster solution, you can also use paint hardener packets, which, as the name suggests, are designed to harden paint quickly.


Just get them at your local hardware or paint store, and follow the label instructions. Paint hardener packets can solidify a full can of latex paint in under an hour!


Once your paint is dry and hardened, you can safely dispose of it. But even then, there may be local regulations to adhere to.


Your state may require that you label it “Dried Paint”, or you may even need to bring the dried paint to a designated drop-off point. Make sure to read up on your local regulations.


Either way, you should always leave the lid off so that waste collectors can verify that it’s dried and hardened.


Disposing Of Oil-Based Paint
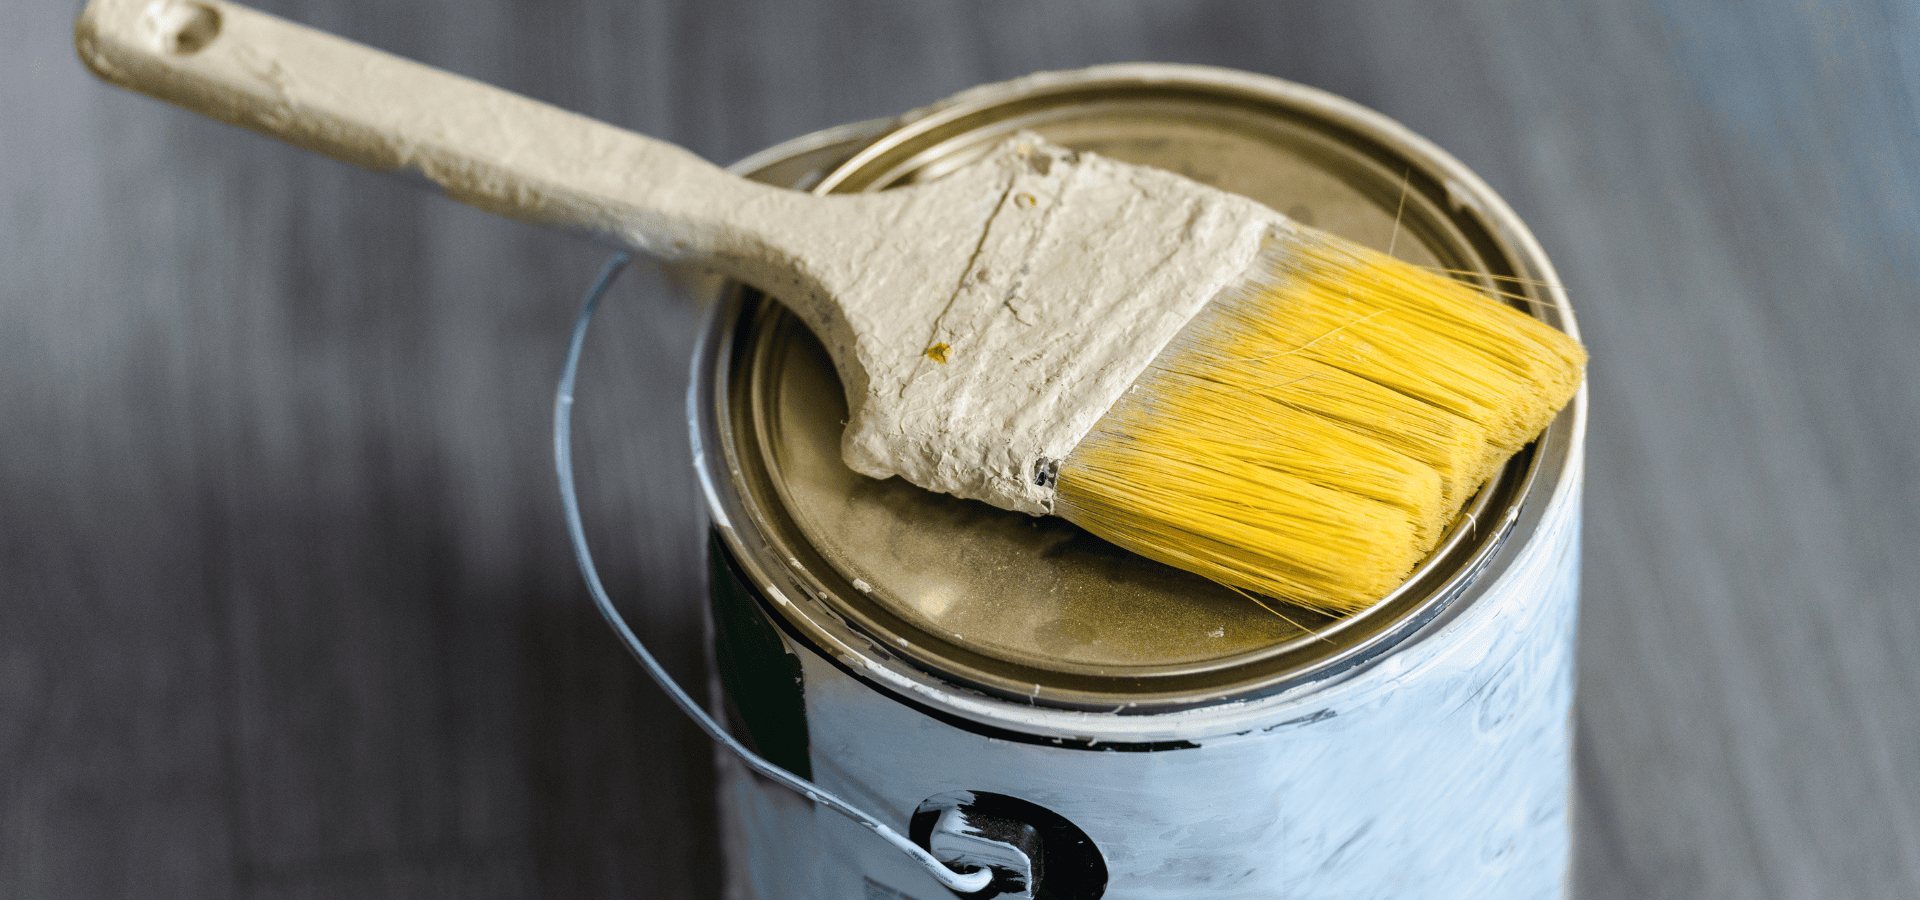
A can of leftover yellow oil-based exterior paint

Oil-based paint is classified as hazardous waste in all US states, so your only disposal options are your local HHW program, or PaintCare sites if they’re operating in your region.


Take note that PaintCare won’t recycle oil-based paint; they’ll usually just help you dispose of it safely.


When you’re going to drop off your oil-based paint, keep it in its original container with the labels intact, and when you’re transporting it to the drop-off point, ideally, put it in a leak-proof box. If not, make doubly sure that it doesn’t leak on the way there.


Oil-based paints are a fire hazard and they’re toxic, not to mention the clean-up hassle, so you don’t want them to leak either way.


Ending Tips


With that, you now know how to safely and properly dispose of and recycle paint.


Before we end off, here are some final tips.


When you’re storing your paint, you don’t want it to quickly dry up or become unusable, so you need to store it properly to ensure it stays in good condition for as long as it can.


When you’re storing your paint, wipe the rim clean first before you cover it up, as residual paint can create tiny air gaps.


Then, place plastic wrap over the opening before covering the lid over. The plastic wrap will fill microscopic gaps caused by rim imperfections, and it also makes the lid easier to remove, because the paint might glue it tight otherwise.


Lastly, store your paint in a cool, dry, temperature-controlled room, ideally somewhere indoors in your home, away from direct sunlight. Avoid garages and sheds, even if they’re the most convenient.


Make sure to also label the container clearly with the paint color, date used, and which room or area you used it for. This will help you track whether the paint is over its shelf life, and if you ever need to perform touch-ups and repairs, find the right paint easily.


Remember, your painting project isn’t over once you’re done with the painting. Proper storage and waste management are essential to protect the environment and ensure everyone’s safety.

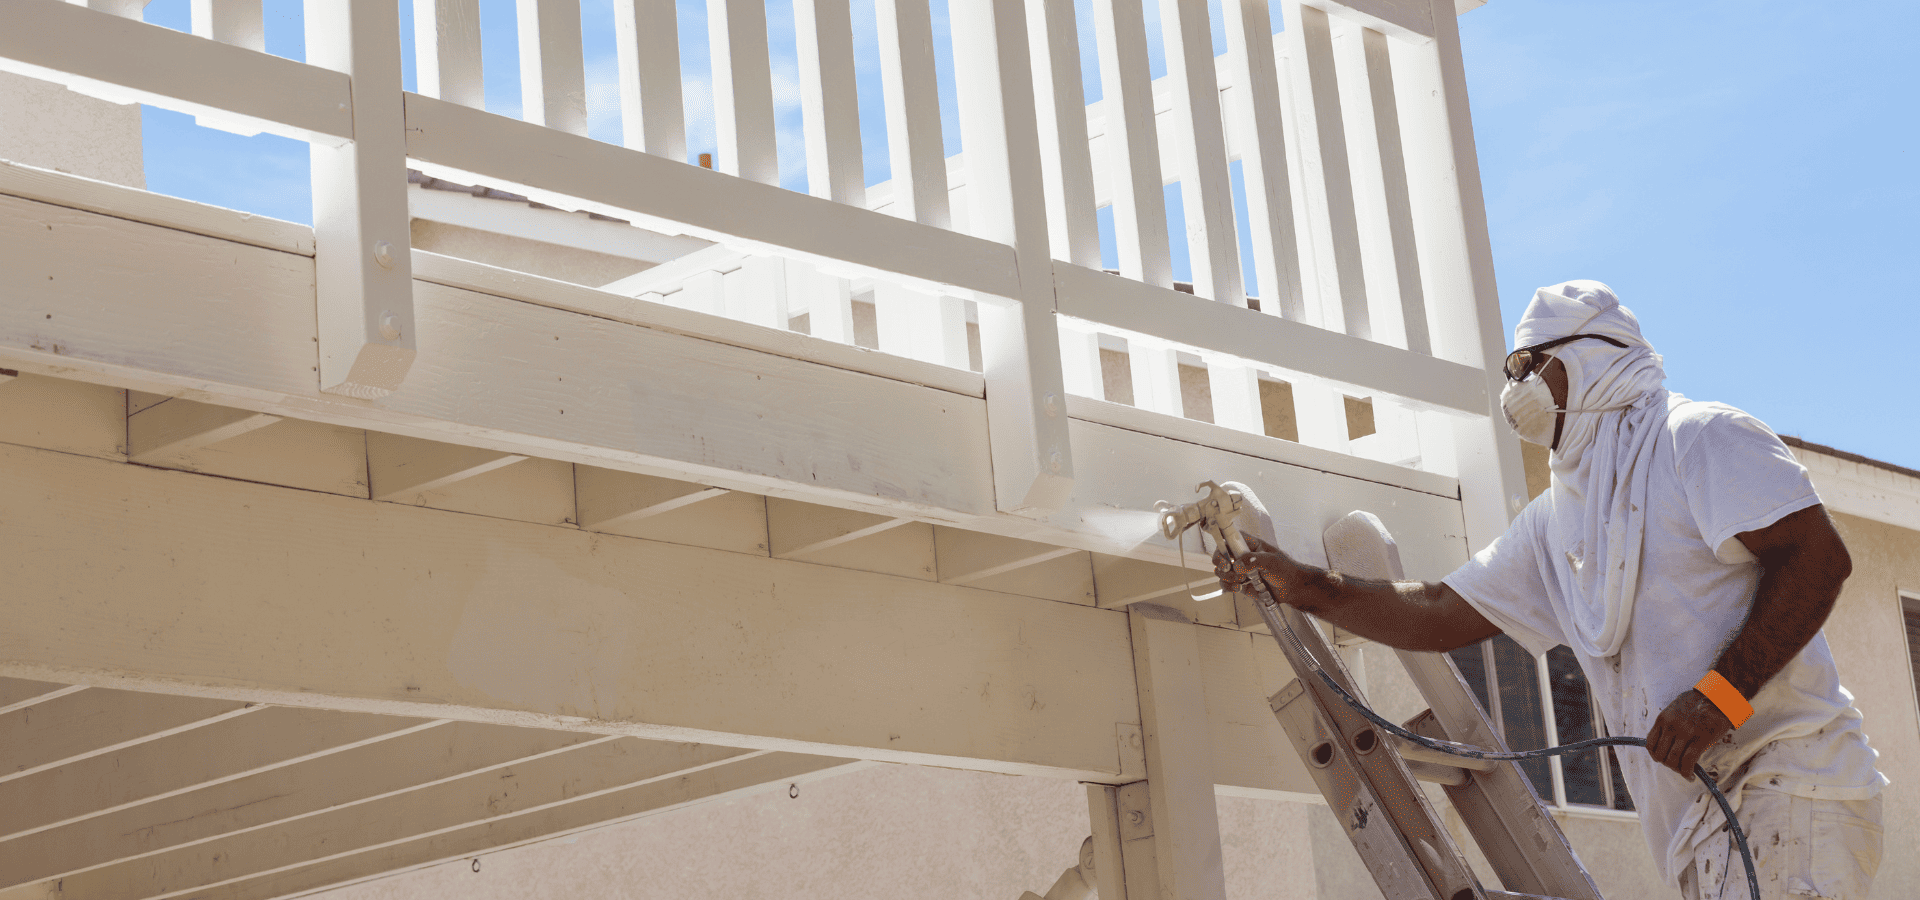
Worker spraying white paint on the bottom of a balcony in Raleigh, NC
August 5, 2025
At first glance, using a paint sprayer seems like a much easier way to get your house painted than rolling. You just spray over the areas that need to be covered like spraying a hose, and voila , you now have an evenly covered, smoothly painted wall. No need to go through hours of rolling, and no need to make sure that you maintain consistent pressure and cover every spot on the surface evenly with your roller. However, in reality, it’s a bit more nuanced than that. Spraying is undoubtedly a much faster and more efficient way to go about painting your home. But while it sounds straightforward, spraying paint is a longer and trickier process than most homeowners realize. It comes with its fair share of additional steps and demands, which you need to be aware of before you go out and purchase a paint sprayer and start spraying your walls. Now, we’re not saying don’t spray paint your home. In fact, there are various situations in which you should definitely be spray painting instead of rolling. The key is to know when to spray paint and when to roll. Both spray painting and rolling have their pros and cons, and in this article, we’ll be breaking them down for you, as well as going over when to use each paint application method. What Is Spray Painting?  Spray painting works by atomizing paint into fine droplets, so that when you spray the paint, it comes out as mist. When done right, it not only allows you to cover large areas quickly, but also uniformly, and it gives you a smooth, professional-looking finish. The downside is that it requires much more preparation, and the technique is harder to learn than rolling. Without the right technique, you could easily end up with ugly streaks or even have to redo the entire paint job. As such, while spray painting can be faster, its speed also means that it’s harder to control, and when things go wrong, they can go downhill fast. What Is Rolling?
A green eco-friendly circle stamp
July 29, 2025
VOCs (volatile organic compounds) are chemicals that help traditional paints dry quickly and adhere well. If you can smell that fresh paint smell, it means that your paint contains VOCs. These chemicals are necessary for paint performance, at least for traditional paint, but unfortunately, they also pose health hazards and environmental risks. VOCs can cause headaches, dizziness, nausea, liver and kidney damage in the long term, and various other health issues. And kids, seniors, and those with asthma or allergies are more prone to those effects. This isn't usually a problem outdoors since they dissipate quickly, but indoors, in an enclosed space, with possibly poor ventilation, VOC levels can get quite high, leading to negative health effects. According to the Environmental Protection Agency (EPA), after a paint project, indoor VOC levels can be up to 5 times higher than outdoor levels. Obviously, this is less than ideal, which is why it's worth paying more for low or even zero-VOC paints. Still, some would argue that it's only a one-off painting project, so as long as there's proper ventilation, higher VOC levels won't pose an issue. We're here to tell you that's not true. But we're also aware you won't just take our word for it — and you shouldn't. Instead, read on to learn about what VOCs are, why they're needed, how much lower-VOC paints cost, and how to actually find them. Then, decide for yourself whether they're truly worth it. Let's begin. What Are VOCs?  First things first, let's go over what VOCs are, because if they're so harmful, why the heck do we put them in paints? VOCs are organic compounds that evaporate easily at room temperature. As paint dries, VOCs get released into the atmosphere, a process known as off-gassing. In other words, after the project is completed, the paint continues to release VOCs for days, weeks, or even longer. The thing is, VOCs are essential for traditional paint to adhere well and dry quickly. Without them, you could be waiting hours or even days for the paint to dry, and it wouldn’t adhere well, which means it’d start peeling in no time. Thankfully, the good news is that with the advancements in technology, today’s paints no longer require such a high amount of VOCs to function well. Some don’t even require VOCs at all. Here’s how modern low-VOC paints perform. Performance Of Low-VOC Paints Lower-VOC paints are every bit as high-performance as high-VOC paints, and can even beat high-VOC paints in certain aspects. Here’s how they match up. Application & Ease Of Use
Professional house painter painting a Raleigh homeowner's living room walls
July 22, 2025
Looking to hire a professional house painter in Raleigh, NC , but not sure how to find a good one? Whenever you're engaging a painting company or any sort of contractor, doing your due diligence is crucial to ensuring you find a solid contractor. It's not just about whether they can get the work done well. A good contractor should have the necessary credentials, be willing to back up their work with a warranty, and take care of your property while carrying out the job. Doing the necessary research may feel slightly tedious, and is definitely more effort and time spent on your part, but you need to be meticulous when vetting contractors. Otherwise, you could be stuck with peeling paint and no warranty to fall back on. Or if you end up hiring a painter who isn't registered or insured, there's nothing protecting you when things go wrong. Sounds scary? Great! Then you should be ready to do your research. Here are the things to look out for when engaging a house painting contractor in Raleigh, NC. 1. Registration And Insurance Since painting is typically only cosmetic, there isn't much risk or danger of structural damage or people getting hurt from sharp tools. As such, painting projects generally have less strict regulations than larger and more expensive projects like bathroom remodeling and roofing. Licenses are also usually not required unless the size of the job is more than $40,000, and permits aren't required either way as long as the project scope is just painting. Having said that, it's still important to ensure that your contractor is registered as a business in North Carolina. You can verify this by doing a search on the NC Secretary of State’s website . Type in the company or painter’s name, and the status should be “Active”. That means the business is legally recognized by the state of NC, is current on its filing and fees, and is authorized to operate in North Carolina. It also means that you can hold them accountable and pursue legal recourse if things go awry. Another important box to check is whether the contractor is insured . Specifically, the contractor or company should have general liability insurance, as well as workers’ compensation insurance if they have a team. General liability insurance covers third-party bodily injury, property damage, and legal liability. This doesn’t mean they can act as they wish and be protected from legal damage, or can get away with intentionally damaging your property or others. General liability insurance only covers the above-mentioned areas if it was unintentional, eg someone trips over their materials, or the contractor spills paint on your hardwood floor, or if you sue them as a result of their unintentional mistake. It doesn’t cover poor workmanship or damage to their own tools, or if their own workers get injured on the job. That’s covered by the other insurance we mentioned — workers’ compensation insurance. Workers’ compensation insurance ensures that if a crew member gets injured on your property, such as if they fall off the ladder, the responsibility doesn’t fall on you. Without either of these insurances, you could be in a lot of trouble if things go wrong. Even though those damages should rightfully fall to your contractor, if they don’t have insurance, and they refuse to cover damages, you’ll end up having to bear it all. You could take legal action, but that’s an expensive route even if you win. Or worse, they could even turn around and sue you if their workers get injured on your property, claiming unsafe conditions. So always request to see the Certificate of Insurance for general liability insurance and workers’ compensation insurance if they have a team, and check that they’re current and valid. 2. Warranties
Homeowner painting his home's exterior before listing it for sale in Raleigh, NC
July 15, 2025
A fresh coat of paint is one of the most cost-effective ways to refresh your home. Instead of having to drop a fortune on bathroom remodeling, kitchen remodeling, or landscaping, a paint job can give you similar results and breathe new life into your home. Given the relatively low cost of a paint job, you’d be hard-pressed to find a home improvement project that delivers a higher ROI than house painting. It’s even possible for you to recover your initial investment fully, or even make some profit off of it. As such, when you’re putting your home on the market, a fresh paint job is a no-brainer. On top of fetching a higher price, it also helps get your home sold faster and ensures the sale goes through more smoothly. Painting for home resale and for your own use are two very different things though. When you’re painting your house for your own use, you can express yourself however you want. You can use bolder colors and less popular finishes, such as a navy bedroom, deep green bathroom walls, or textured living room walls. On the other hand, when you’re preparing your home for potential buyers, you’ll want to strategically stick to safe, neutral, universally liked colors, as well as finishes that can hide imperfections, such as matte. And when you’re painting a home that you’re going to be living in, you can spend more time or money to achieve the exact look that you want. But when you’re selling your home, the goal is to spend as little as possible and get as much back in return as you can. The more you spend, the lower your ROI, so you won’t want to be wasting money on custom designs that buyers may not necessarily appreciate. So when you’re painting your home in Raleigh to sell it off, you need to think it through and make sure every penny is well-spent. Not sure how to do that? Then you’re in the right place. Let’s jump right into it! Why Repainting Is A Must Before Listing Your Home For Sale In Raleigh
Large holes in wall paint caused by dampness and moisture
July 9, 2025
Your home’s exterior painting is one of the first things visitors see, and it's also the most noticeable element. A good paint job can impress visitors and send a strong first impression, while a dirty and poorly maintained exterior ruins even the most well-designed homes. It's not just aesthetics either. Your paint is the first line of defence against harsh elements like UV rays and moisture, and it protects your siding and the layers underneath. That's why painting maintenance is of the utmost importance. It keeps your home looking its best, and more importantly, protects it from the sun, wind, and moisture. In Raleigh, paint maintenance is even more crucial because of the humid summers, sudden storms, and tree density. Humid summers mean higher risks of mold, mildew, moisture damage, and paint deterioration. Sudden storms mean rain, dirt, and debris can be blown into your home before you have a chance to close your windows. And lastly, Raleigh is aptly nicknamed the “City of Oaks” due to its abundance of mature oak trees that are large and provide ample shade. This shade is normally nice to have, but it also means more falling leaves, twigs, as well as sap and pollen. All of these can damage or stain your paint. The high density of trees also means more dampness, especially after storms. You'll also likely encounter more bird and squirrel droppings, which can stain and degrade your paint finish. Painting maintenance is essential either way, but Raleigh’s conditions make wear and tear an even bigger issue, necessitating more frequent and thorough upkeep. Don't let that scare you though. Painting maintenance is actually easier than it sounds. All it takes is regular cleaning and timely touch-ups to keep expensive repairs at bay and extend your paint’s lifespan. Not sure how to carry out those steps? Well, that's what this guide is for! Whether you're staying in a modern townhouse in North Hills or a historic bungalow at Oakwood, you'll find everything you need to ensure your paint and home stay healthy and look sharp all year-round. Let's dive right in! What Painting Maintenance Entails  You might be wondering what there is left to maintain once the paint has been applied. Is it coating? Or some kind of protectant or sealant? The answer is neither. Most of the time, paint maintenance is really just cleaning and inspection, and on the rare occasions when you do discover any issues, remedying them. And then, once every 5-10 years, repaint the surface. Note that this can be longer or shorter depending on the type and quality of paint you use and the conditions of your region. So as you can see, maintaining your paint job really isn't a super tedious task. The important thing is to do your cleaning and inspections regularly and thoroughly. Now, let's dive deeper into how to actually carry out the cleaning, inspection, fixing issues, and repainting. 1. Cleaning Painted Surfaces In Raleigh
3 cans of enamel paint in red, beige, and pale green, for painting trim and doors
July 1, 2025
When it comes to house painting, most people spend the bulk of their time worrying about what color to use, making sure it complements their aesthetics, and choosing the right shade. In many cases, little thought is given to the type of paint. In fact, many people don't even know that different types of paint exist, and that choosing the wrong paint could be disastrous. Using the wrong paint will usually lead to it peeling off relatively quickly, or at the very least, unsightly bubbling. Needless to say, nobody wants these to happen, which is why we created this guide on the different house paint types and when to use each of them. By the end of this guide, you'll know all the different types of paints, and you'll know how to choose the right one for the surface you're painting. Let's jump right into it! Water-Based vs Oil-Based Paint First up, let's begin with the two main categories of house paint — water-based and oil-based. 99% of the time, you're going to be using paint that falls into either one of those two categories. Here are the main differences between the two. Water-Based Paint Water-based paints (aka latex paints) are the most commonly used type of paint for house painting because they release much less odor, dry quicker, and are much easier to clean up. Water-based paints can dry within an hour or two, which is multiple times faster than oil-based paints. And unlike oil-based paints, since water-based paints consist mostly of water instead of oil, they have less toxic fumes and much less odor. On top of that, water-based paints can be cleaned off surfaces easily, which can’t be said for oil-based paints So why would anyone choose oil-based paints? One word — durability . Oil-Based Paint  The main advantage of oil-based paints is that they’re extremely tough, a good deal tougher than water-based paints, and they’re also better able to resist stains and moisture. The downsides are many though: Much longer drying times (8-24 hours) Much stronger odor and more toxic fumes, sometimes to the point where certain regions restrict their use Much harder to clean off spills, will need the use of turpentine or mineral spirits Water-based paints nowadays are far more durable and stain-resistant than in the past, which is why, in many cases, the added durability of oil-based paints just isn’t worth the drawbacks anymore. Water-based paints are still less able to take a beating and resist stains and moisture, but technology has closed this durability gap significantly. As such, people nowadays are increasingly opting for water-based paints over oil-based paints, even for surfaces that might need a bit more toughness. The only time when it makes sense to choose oil-based paints is for surfaces that have serious human traffic or will be exposed to lots of moisture or harsh elements, which is really only your handrails. Other than that, even for areas like your bathroom walls that will be exposed to moisture, or outdoor surfaces, specially formulated or high-quality water-based paints will get the job done. Oil-based paints are essentially obsolete in modern day, with the exception of very specific situations. As long as you’re not painting handrails, go with a water-based paint. Interior vs Exterior Paint
Painting metal pipes red with a mini roller
June 24, 2025
When it comes to painting, the first image that comes to most people's minds is painting their walls with a roller. But did you know there are actually many different surfaces that each require different painting techniques, tools, and even paint types ? If you've got a bit more DIY experience, you may already know that trim calls for glossier paint and an angled brush. For most people, the walls and trim are the main areas that they ever paint, so even experienced DIYers may stop there. But there are actually a few other surfaces, such as your pipes or fireplace, that, while much less commonly painted, are still good to know. You might not need to paint them now, but one day you might. So put on your reading glasses, and let's begin. 1. Walls And Ceilings First up are your walls and ceilings. These are the most commonly painted surfaces, so you might already know how to paint them. If that's the case, feel free to skip this section and any others that you already know how to paint. With that said, let's get back to painting walls and ceilings. For your walls and ceiling, before you start painting, you need to prepare the surface. This involves repairing damages, cleaning, and applying primer if needed. Before we go any further, a word on repairing damages. You could try to DIY the repairs, but if it's anything larger than a tiny dent or hole, we highly recommend that you leave it to the professionals. Repairing wall and ceiling damages is a deceptively tricky task that most homeowners just don't have the expertise and skill to tackle. Any DIY attempts usually result in an even uglier sight than the original damage. So trust the pros, and leave it to the pros. After repairing the damages and cleaning your walls and ceiling, you’ll need to apply primer (2-3 coats) if: You're painting relatively new drywall or plaster You're painting a light color over a dark color You've removed wallpaper You've patched the area. Note that you can apply primer over only the patched areas if you didn't have to patch too large an area. But if you've had to patch a large area or many areas, it's best to just prime the entire painting surface. Once the prep is complete, paint with a roller using the “W” technique. For a complete in-depth guide on how to choose paint, prepare your walls, and the tools and equipment you’ll need for house painting, check out our DIY house painting guide . 2. Wooden Surfaces (Trim, Doors, Cabinets)
Professional painter on a ladder painting the higher parts of client's walls
June 14, 2025
House painting is generally not an expensive home project since all you need is really paint, a roller, a brush, and a few other relatively cheap tools and equipment . Even if you factor in the cost of labor, a professional paint job is still on the lower end of home projects. Nevertheless, you still need to have a proper, accurate budget for it. If you budget too little, you won't be able to finish the job or may have to compromise on paint quality, and if you budget too much, that leaves less for your other home projects. To budget accurately, you obviously need to know the costs involved, which is why this article will break down the costs of house painting, as well as give you two ways to calculate how much to set aside based on the size of your house and the room you're painting. We’ll also be going over the cost of professional vs DIY house painting so that you can make a decision as to whether to engage professionals or not. Let's get started. House Painting Cost Per Square Foot The easiest way to get an accurate idea of how much you'll need to spend is to calculate the surface area that you'll be painting and multiply that by the cost per square foot taken from national averages. According to Angi , here are the cost averages nationwide in the US for professional painting the interior of your home: For just walls: $2.75/sqft Including ceilings and trim: $4.70/sqft These costs are inclusive of both materials and labor, so they're all-inclusive. In Raleigh, NC, you can expect to pay between $1.50 and $3.10 per square foot for just the walls, and between $2.40 and $5.40 if it’s including ceilings and trim. So to get an idea of how much your home painting project will cost to have a professional do it, measure the length and width of all the walls and combine them to get the total surface area. Then, simply multiply this number by the averages provided above. On average, the cost of interior painting an entire home is $2,021, although costs can go up as high as $5,800 or as low as just $350. Keep in mind that many factors affect this price, mainly the size of your home, but also other factors like the paint used, the complexity of the job, and the amount of prep work needed. If you don't want to go through the hassle of measuring all the walls in your home, you can simply take the average cost of interior painting for a house, which is $2,021, and increase or decrease it accordingly based on whether your home is larger or smaller than average. Or if you're only painting certain rooms and not your entire home, read on to our next section, where we break down painting costs by room type. House Painting Costs By Room
Painter from Renewed Walls Painting holding his painting tools and equipment in a bucket
June 11, 2025
Painting your home is an exciting venture that can transform your home and give it new life — but only with the right tools. Without the necessary tools and equipment, even the best professional painters would find it difficult, nigh Impossible, to properly paint a home and achieve a smooth, flawless finish. You can't just use a single brush or a single roller for every part of your home. Different areas and different techniques require different tools and equipment, and it's crucial to know what you need for each part of the job to ensure a successful project. Here are the tools and equipment you'll need to paint your home. Painting Tools & Equipment First up, here are the must-have tools you'll need for the actual painting itself. 1. Paint Brushes Paint brushes are a must to start off and finish your painting project. You can't just use a roller for everything. Rollers are great for covering large areas quickly, but for precision work like edges, corners, and trims, you're going to need a brush. There are mainly two types of brushes — angled and flat. Honestly, the flat brush doesn't really have much of a use, because for corners and edges of your walls, doors, and so on, as well as trim work, it's best to use an angled brush that allows you to get to awkward angles more easily. A single angled brush is going to be enough to serve you for all your precision work, especially if you're painting walls. And if you're painting the main areas of your walls, doors, cabinets, etc, you're going to either be using a standard or a mini roller. There's just no situation in which a flat brush is the best option. When buying your angled brush, you'll also need to choose the right thistles. If you're using latex (water-based) paint, use synthetic bristles, and if you're using oil-based paint, use natural bristles. 2. Paint Rollers Next up is your paint roller. Note that the paint roller actually comes in two parts — the roller frame and the roller cover. When it comes to rollers, there are really only two types — standard and mini ones. Standard 9-inch rollers are the ones you use to paint your walls, and mini 4-inch rollers are the ones you use for your doors, cabinets, and any other smaller surfaces, excluding precision work like edges and corners of course. The thickness of the roller cover is important too. For smoother walls, you want thinner ones, while for rougher walls, you want thicker roller covers. The reason for this is that thicker covers hold more paint, so when used for smooth walls, there's nowhere for the additional paint to go, which means it pools, runs, or results in a fuzzy or pebbled texture. Thicker covers are used for rough surfaces with dips, bumps, or crevices. They can push paint into these dips and crevices since they hold more paint. Here's how to decide: Smooth surfaces (drywall, wood): 1/4 to 3/8-inch Semi-smooth surfaces (old doors, old cabinets): 3/8 to 1/2-inch Textured surfaces (brick, stucco): 3/4-inch or more 3. Paint Trays And Liners
June 1, 2025
Thinking of painting your own home ? Painting can actually be pretty therapeutic, especially if you love DIY projects or creating art. Even if it’s not enjoyable, for the sake of cost-efficiency, many people still opt to paint their own homes, especially if it’s a small area or just a single room. However, it’s not worth it to save on the cost of a professional if you’re going to end up ruining your home’s aesthetics with a poor paint job, which is why it’s important that if you’re planning on painting your house, you know the proper techniques. While painting walls may look simple on the surface, there’s a lot that goes into it — surface prep, pressure, angle, and consistency. These techniques require practice to get the hang of, so be prepared that even if you know the theory of how to perform the technique, smooth and successful execution is still going to take some hard work and practice. The fact is, even with practice, painting is still a tedious and messy task that involves many steps. And when fatigue sets in, DIYers often subconsciously start applying more or less pressure, resulting in thicker or thinner patches. So even if you know the right techniques, success is far from guaranteed. Nonetheless, knowing the techniques is definitely one of the keys to success, and that’s what we’ll be covering in this article. Technique 1: Cutting In
Show More